🔫 使用 Flair 评估零样本 NER#
在本教程中,你将学习如何使用 Argilla 分析和验证来自 Flair NLP 库提供的新的零样本模型的 NER 预测。
🛠 非常适用于快速引导训练集(使用 Argilla 标注模式)以及与弱监督工作流集成。
👁 我们将使用一个具有挑战性且令人兴奋的数据集:wnut_17(更多信息如下)。
🔮 你将能够查看和使用获得的预测结果。
简介#
本教程将向你展示如何使用命名实体识别 (NER)、Flair 和 Argilla。但是,什么是 NER 呢?
根据 Analytics Vidhya 的说法,“NER 是一种自然语言处理技术,可以自动扫描整篇文章,提取文本中的一些基本实体,并将它们分类到预定义的类别中”。这些实体可以是名称、数量、日期和时间、金额/货币等等。
另一方面,Flair 是一个库,它方便了将 NLP 模型应用于 NER 和许多不同语言的其他 NLP 技术。它不仅是一个强大的库,而且也很直观。
感谢这些资源和 Argilla 的 标注模式,我们可以快速构建一个数据集来训练特定领域的模型。
运行 Argilla#
对于本教程,你将需要运行 Argilla 服务器。有两种主要选项可以部署和运行 Argilla
在 Hugging Face Spaces 上部署 Argilla:如果你想使用外部 notebook(例如,Google Colab)运行教程,并且你在 Hugging Face 上有一个帐户,你可以通过点击几下在 Spaces 上部署 Argilla

有关配置部署的详细信息,请查看 官方 Hugging Face Hub 指南。
使用 Argilla 的快速启动 Docker 镜像启动 Argilla:如果你想在 你的本地机器上运行 Argilla,这是推荐选项。请注意,此选项仅允许你在本地运行教程,而不能与外部 notebook 服务一起运行。
有关部署选项的更多信息,请查看文档的部署部分。
提示
本教程是一个 Jupyter Notebook。有两种运行它的选项
使用此页面顶部的“在 Colab 中打开”按钮。此选项允许你直接在 Google Colab 上运行 notebook。不要忘记将运行时类型更改为 GPU 以加快模型训练和推理速度。
通过单击页面顶部的“查看源代码”链接下载 .ipynb 文件。此选项允许你下载 notebook 并在你的本地机器或你选择的 Jupyter Notebook 工具上运行它。
设置#
对于本教程,你需要使用 pip 安装 Argilla 客户端和一些第三方库
[ ]:
%pip install "argilla" "datasets~=2.6.0" "flair~=0.11.0" -qqq
让我们导入 Argilla 模块以进行数据读取和写入
[ ]:
import argilla as rg
如果你正在使用 Docker 快速启动镜像或 Hugging Face Spaces 运行 Argilla,你需要使用 URL 和 API_KEY 初始化 Argilla 客户端
[ ]:
# Replace api_url with the url to your HF Spaces URL if using Spaces
# Replace api_key if you configured a custom API key
# Replace workspace with the name of your workspace
rg.init(
    api_url="https://:6900",
    api_key="owner.apikey",
    workspace="admin"
)
如果你正在运行私有的 Hugging Face Space,你还需要按如下方式设置 HF_TOKEN
[ ]:
# # Set the HF_TOKEN environment variable
# import os
# os.environ['HF_TOKEN'] = "your-hf-token"

# # Replace api_url with the url to your HF Spaces URL
# # Replace api_key if you configured a custom API key
# # Replace workspace with the name of your workspace
# rg.init(
#     api_url="https://[your-owner-name]-[your_space_name].hf.space",
#     api_key="admin.apikey",
#     workspace="admin",
#     extra_headers={"Authorization": f"Bearer {os.environ['HF_TOKEN']}"},
# )
最后,让我们包含我们需要导入的内容
[ ]:
from datasets import load_dataset
from flair.models import TARSTagger
from flair.data import Sentence
启用遥测#
我们从你与我们教程的互动中获得宝贵的见解。为了改进我们自己,为你提供最合适的内容,使用以下代码行将帮助我们了解本教程是否有效地为你服务。虽然这是完全匿名的,但如果你愿意,可以选择跳过此步骤。有关更多信息,请查看 遥测 页面。
[ ]:
try:
    from argilla.utils.telemetry import tutorial_running
    tutorial_running()
except ImportError:
    print("Telemetry is introduced in Argilla 1.20.0 and not found in the current installation. Skipping telemetry.")
1. 加载 wnut_17 数据集#
在本例中,我们将使用一个具有挑战性的 NER 数据集,即 “WNUT 17:新兴和罕见实体识别”,它专注于新兴讨论背景下不寻常的、以前未见过的实体。此数据集有助于了解我们的零样本预测的质量。
让我们从 Hugging Face Hub 加载测试集
[ ]:
# Download data set
dataset = load_dataset("wnut_17", split="test")

# Define labels
labels = ["corporation", "creative-work", "group", "location", "person", "product"]
2. 配置 Flair TARSTagger#
现在让我们按照 Flair 的文档配置我们的 NER 模型
[ ]:
# Load zero-shot NER tagger
tars = TARSTagger.load("tars-ner")

# Define labels for named entities using wnut labels
tars.add_and_switch_to_new_task("task 1", labels, label_type="ner")
让我们用一个例子测试一下!
[ ]:
# Wrap our tokens in a flair Sentence
sentence = Sentence(" ".join(dataset[0]["tokens"]))

# Add predictions to our sentence
tars.predict(sentence)

# Extract predicted entities into a list of tuples (entity, start_char, end_char)
[
    (entity.get_labels()[0].value, entity.start_position, entity.end_position)
    for entity in sentence.get_spans("ner")
]
3. 在 wnut_17 上进行预测并登录到 argilla#
现在,让我们将预测结果记录到 Argilla 中
[ ]:
# Build records for the first 100 examples
records = []

for record in dataset.select(range(100)):
    input_text = " ".join(record["tokens"])

    sentence = Sentence(input_text)
    tars.predict(sentence)
    prediction = [
        (entity.get_labels()[0].value, entity.start_position, entity.end_position)
        for entity in sentence.get_spans("ner")
    ]

    # Building TokenClassificationRecord
    records.append(
        rg.TokenClassificationRecord(
            text=input_text,
            tokens=[token.text for token in sentence],
            prediction=prediction,
            prediction_agent="tars-ner",
        )
    )

# Log the records to Argilla
rg.log(records, name="tars_ner_wnut_17", metadata={"split": "test"})
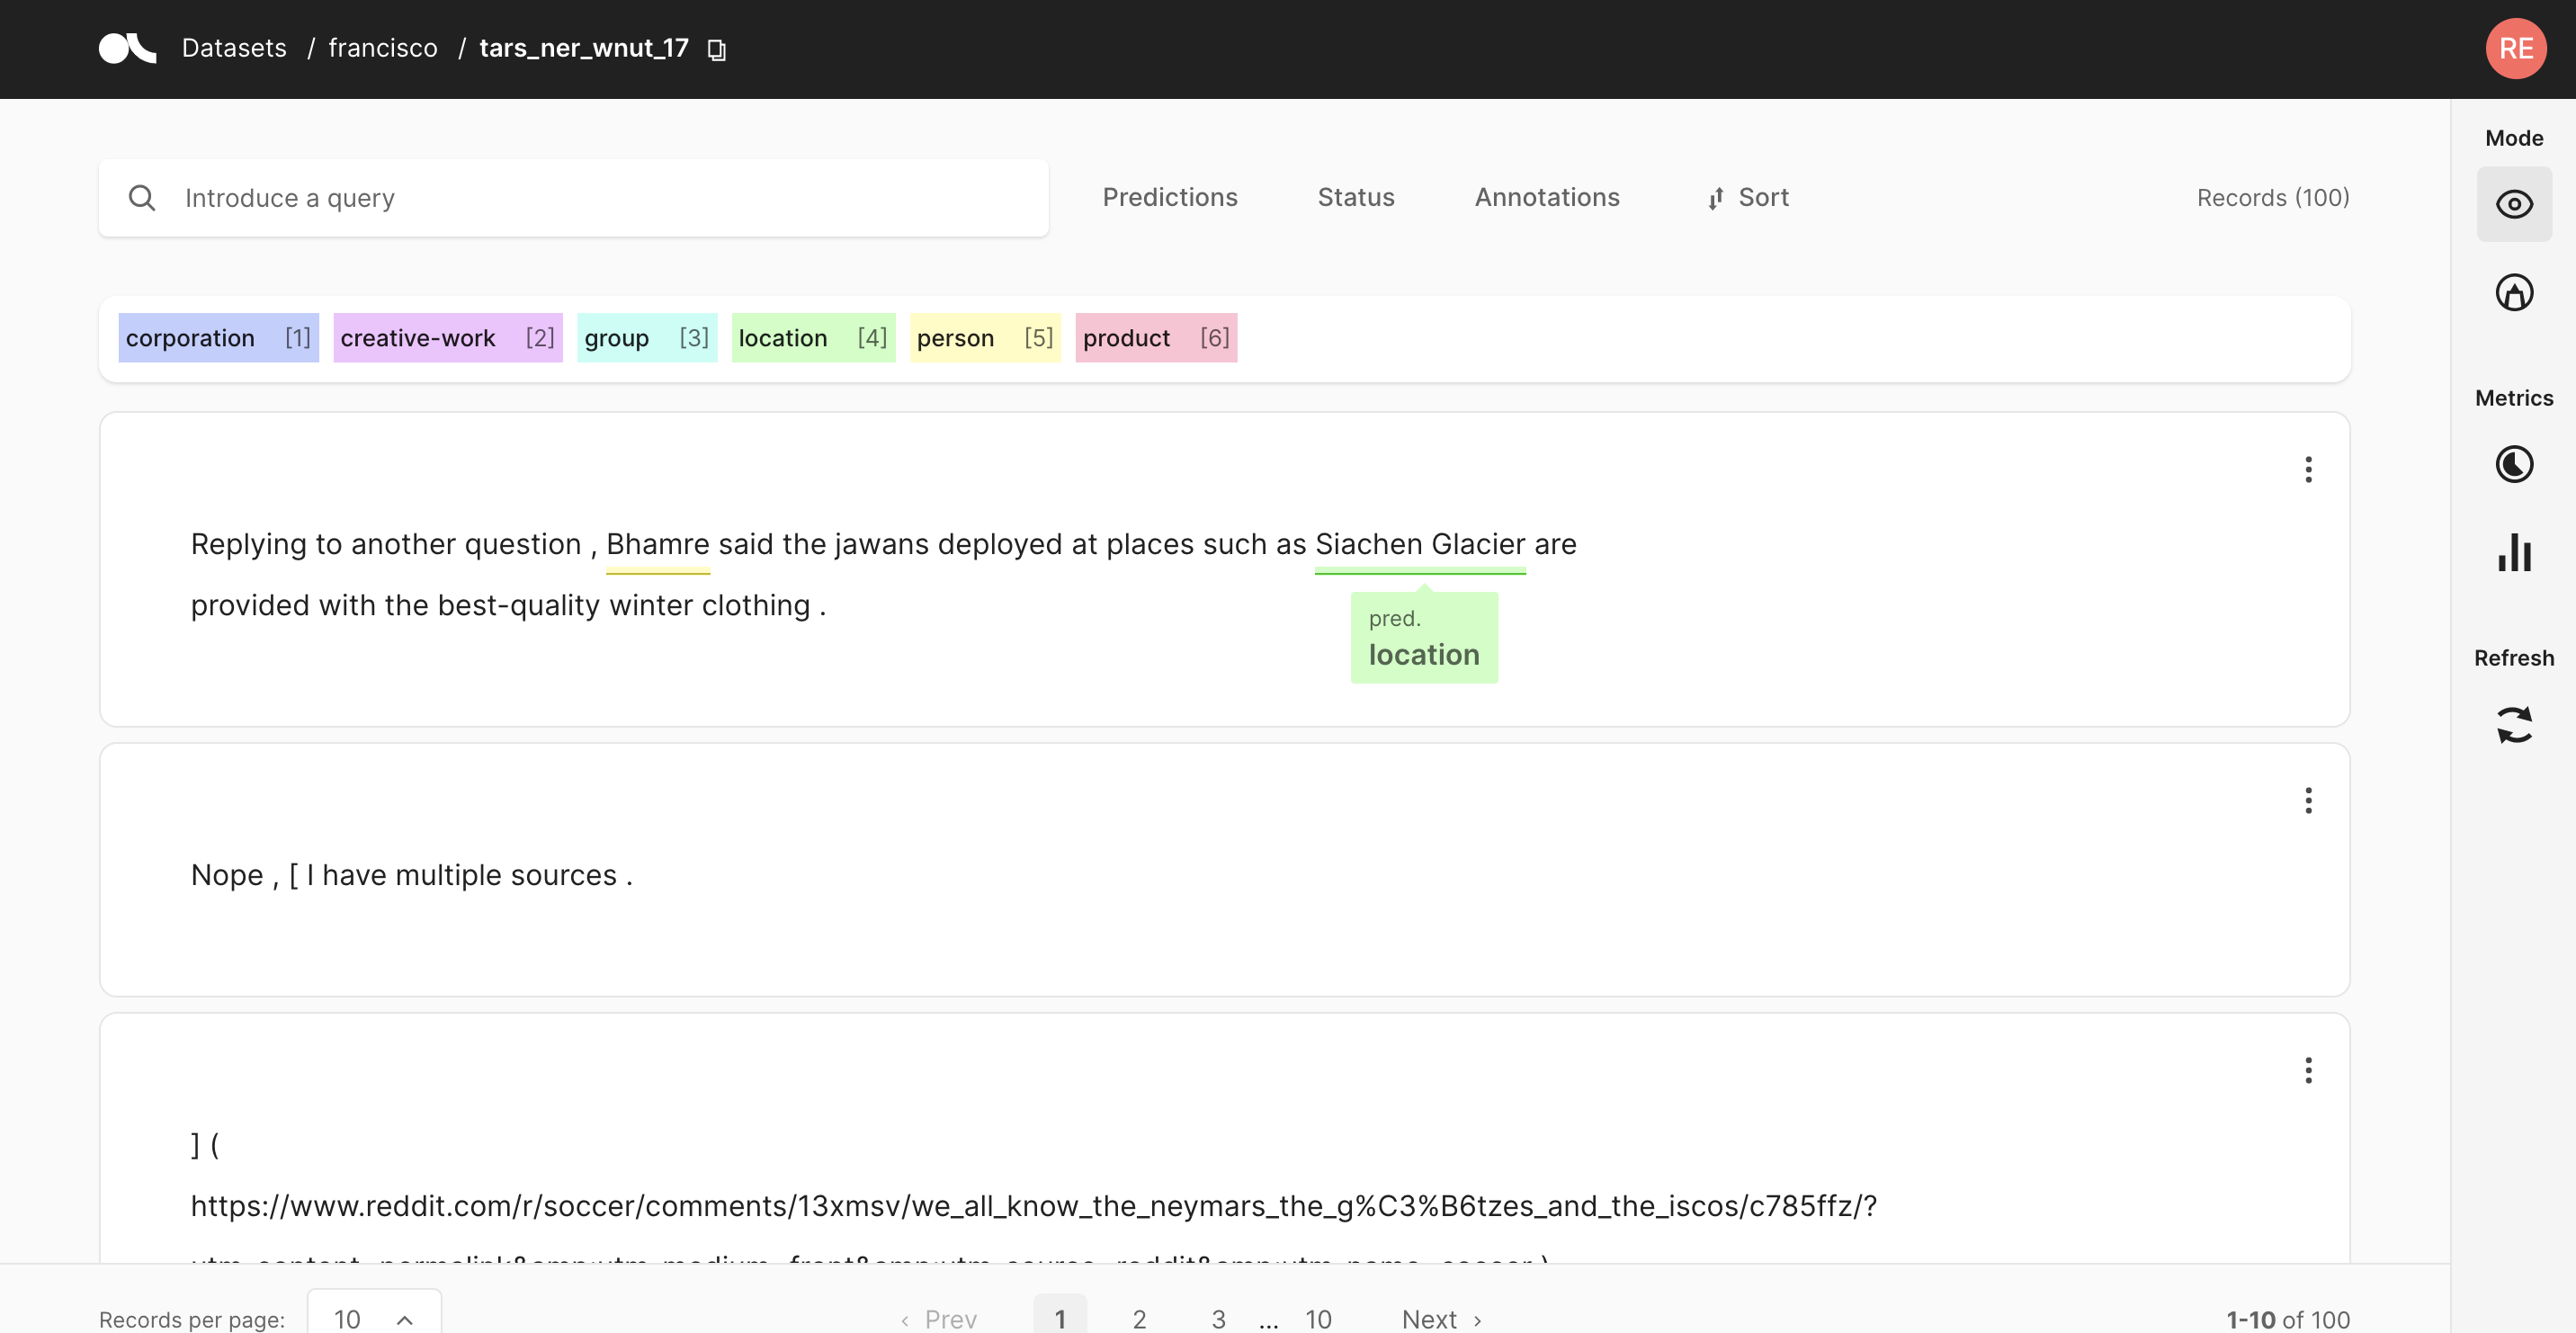
现在你可以看到获得的结果了!使用标注模式,你可以更改、添加、验证或丢弃你的结果。统计数据也可用,以更好地监控你的记录!
总结#
使用零样本方法获得预测结果对于指导人类进行标注过程非常有帮助。特别是对于 NER 任务,Argilla 使探索和纠正这些预测变得非常容易,这要归功于其 手动标注模式 😎。